
How to Create a Webinar
Este artículo aún no está disponible en ES.
Ver la versión en inglés →In this article, you’ll learn how to create a new webinar, set its date, and prepare it for launch.
What You’ll Need Before Getting Started:
A registered account on the platform (click here to sign up)
An active subscription plan
Log in to your account
Step 1. Click the “Create Webinar” Button on the Right
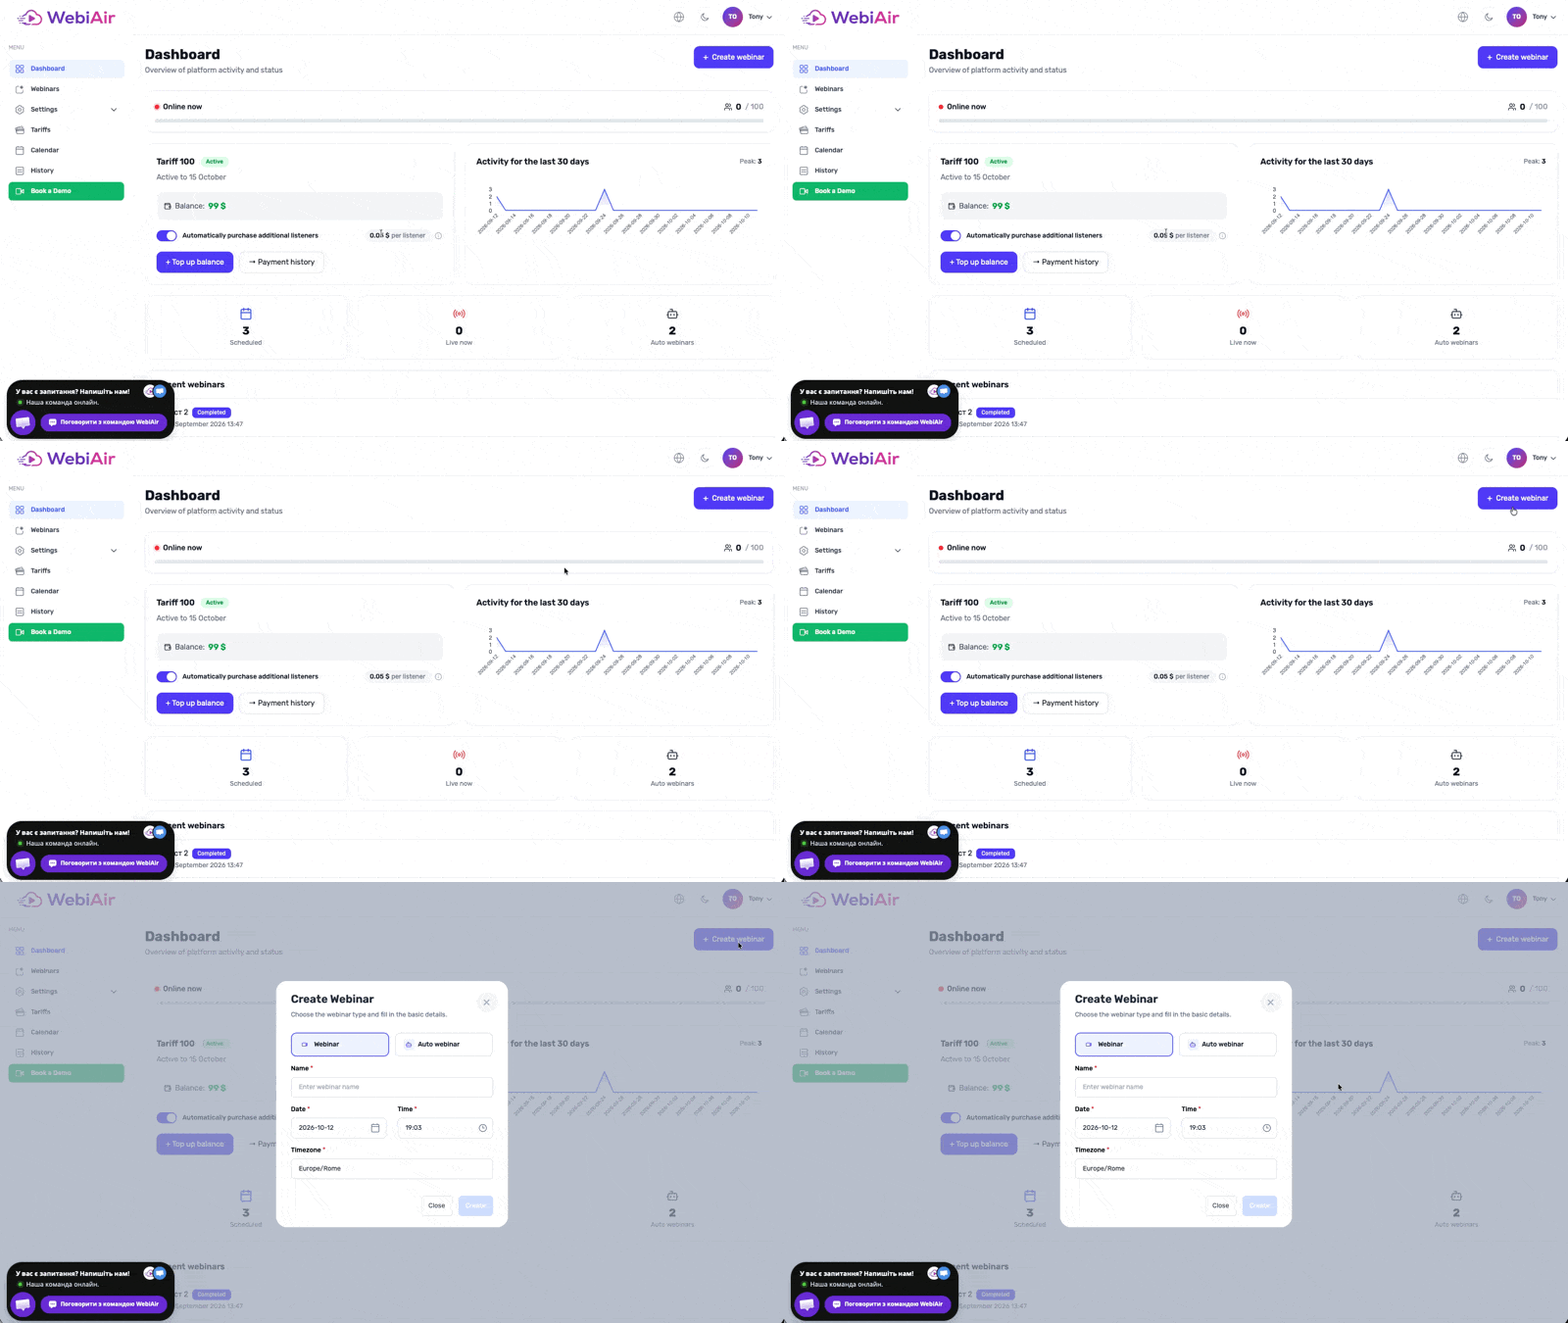
Step 2. Fill In Your Webinar Details
Enter the webinar title and select the date and time of your webinar. Make sure to check the time zone when scheduling.
Once you’ve entered all the required information, click the “Create” button.
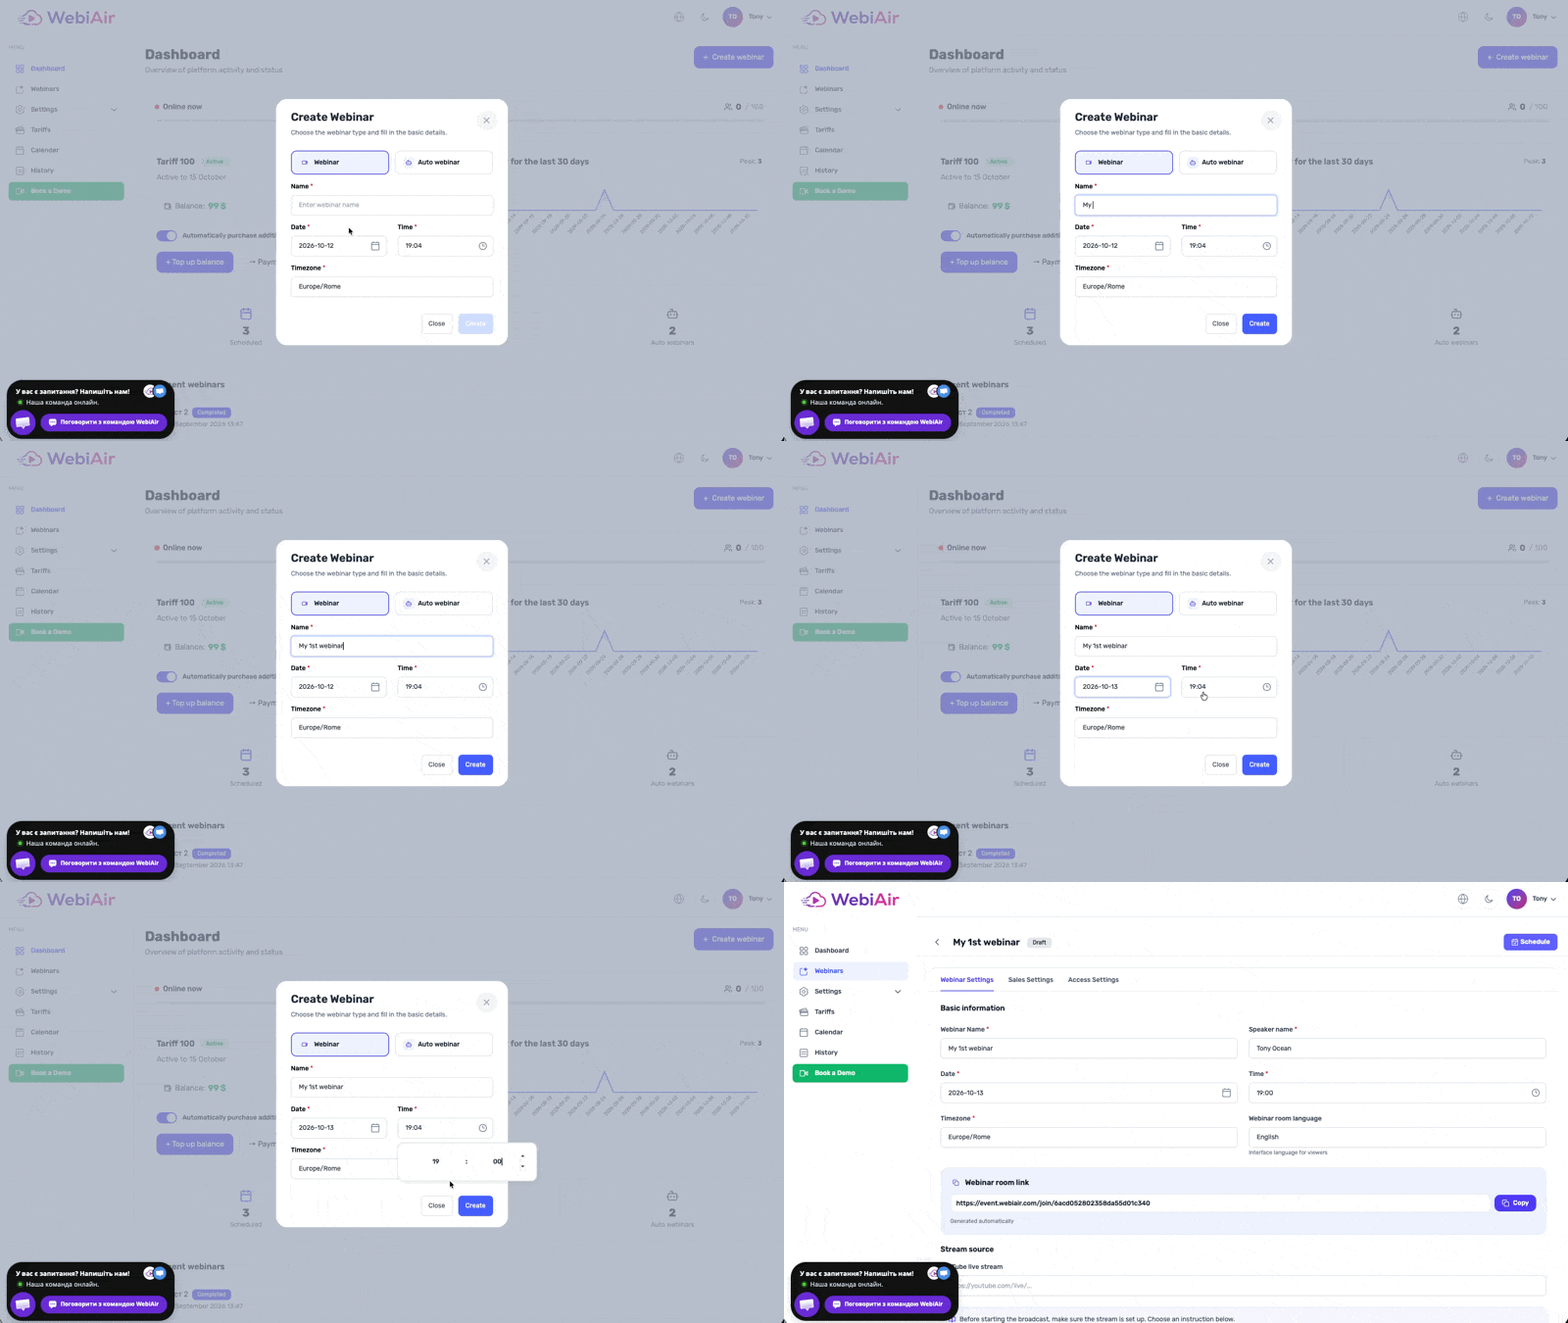
Step 3. Copy Your Webinar Link
Immediately after creating your webinar, you can copy the webinar link and share it with your viewers.
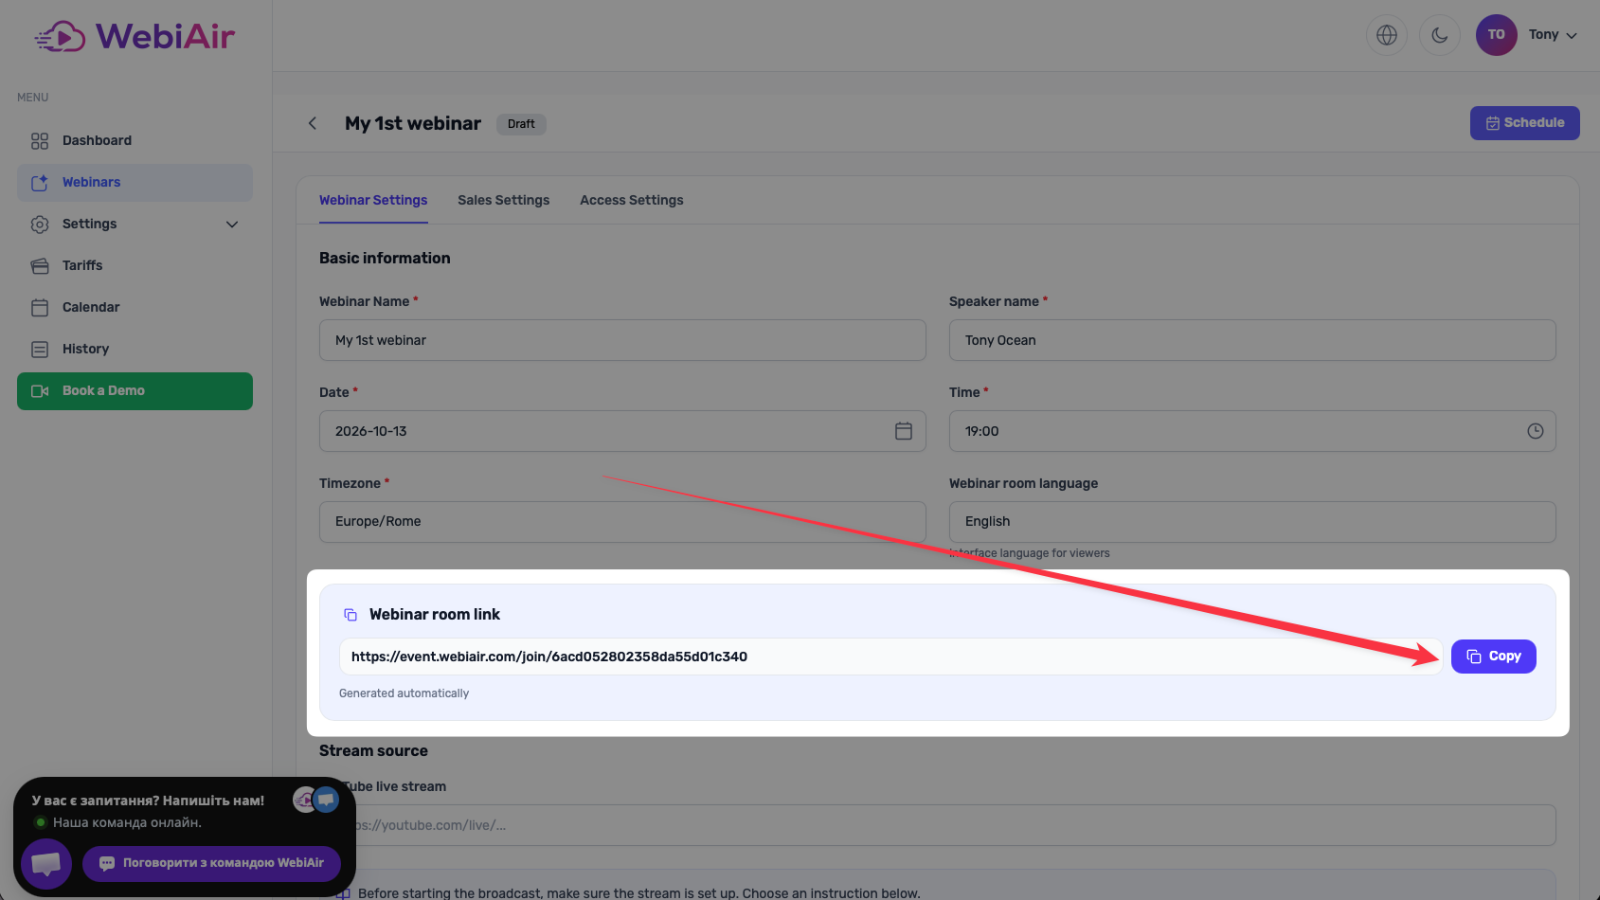
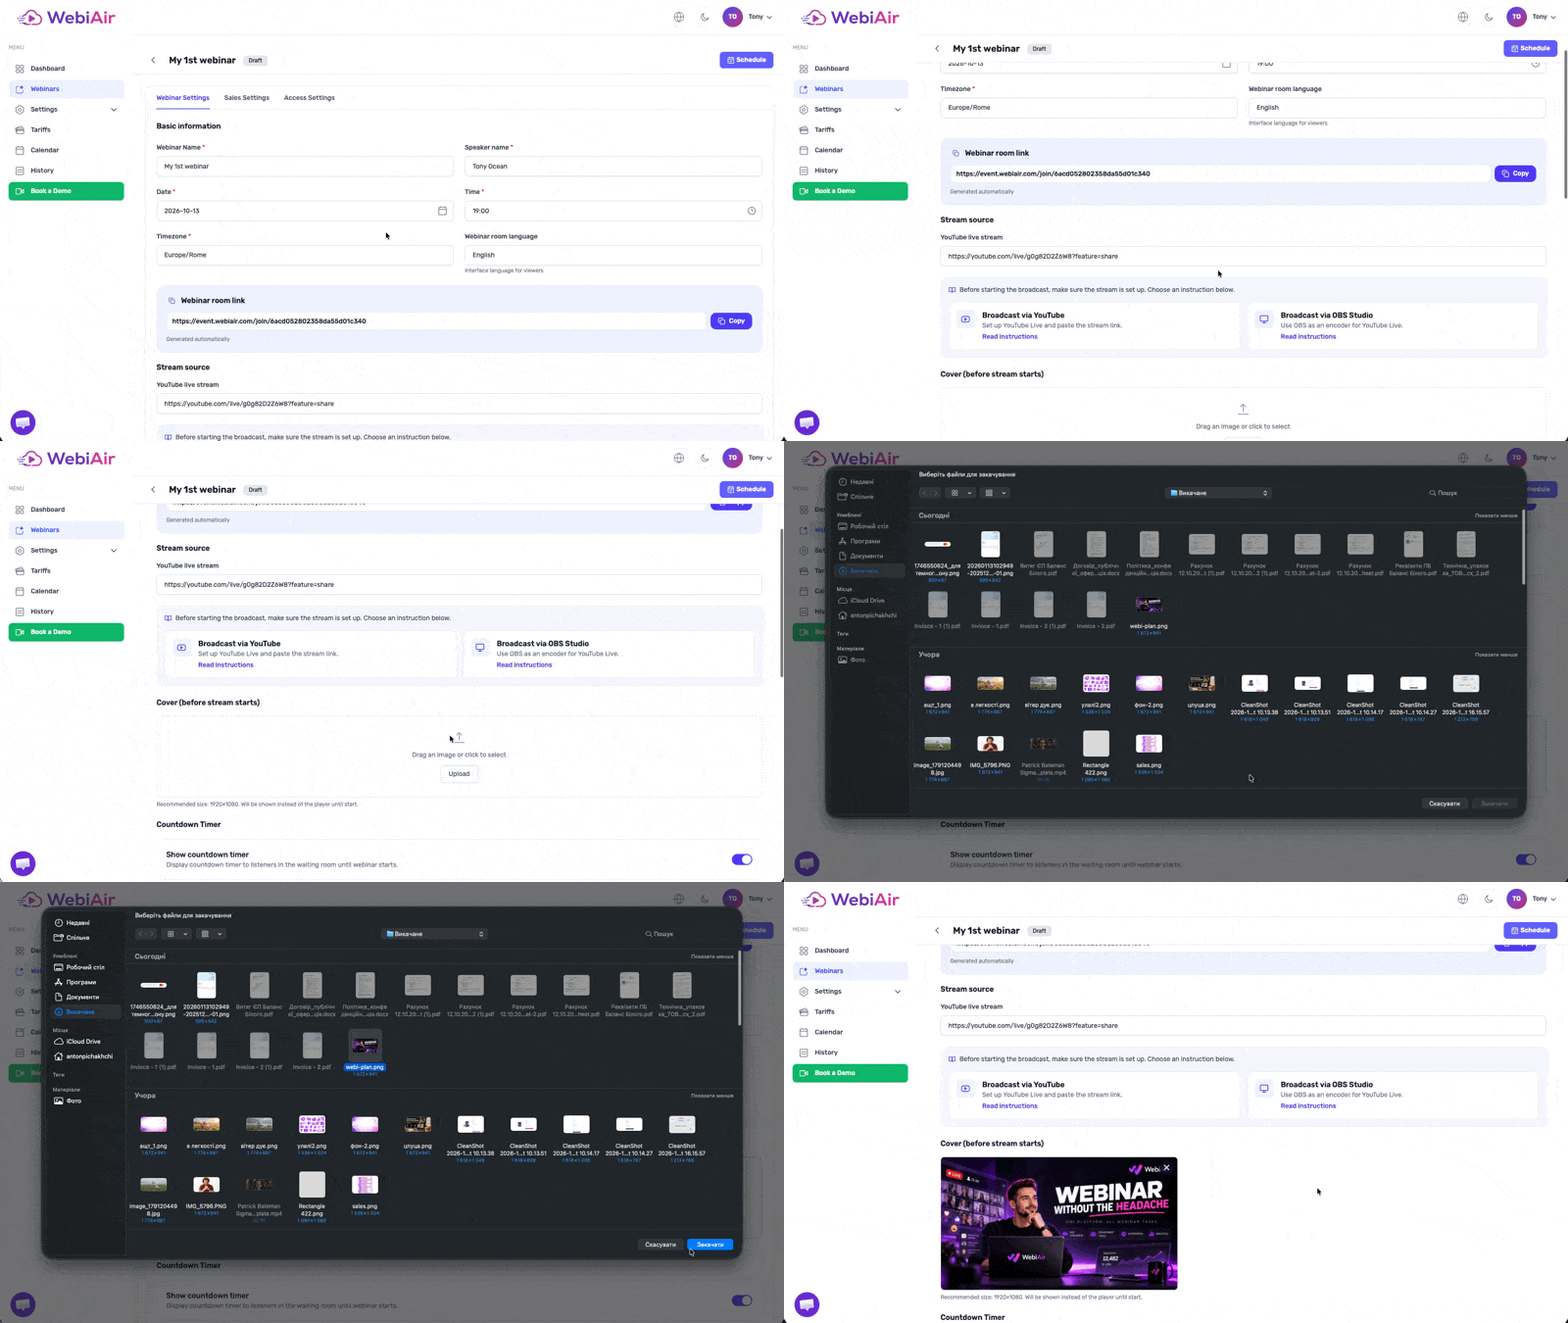
Step 4. Add Your YouTube Live Stream Link
Below, you’ll need to paste the link to your YouTube live stream. You can set up the stream in advance or add the link right before your webinar starts.
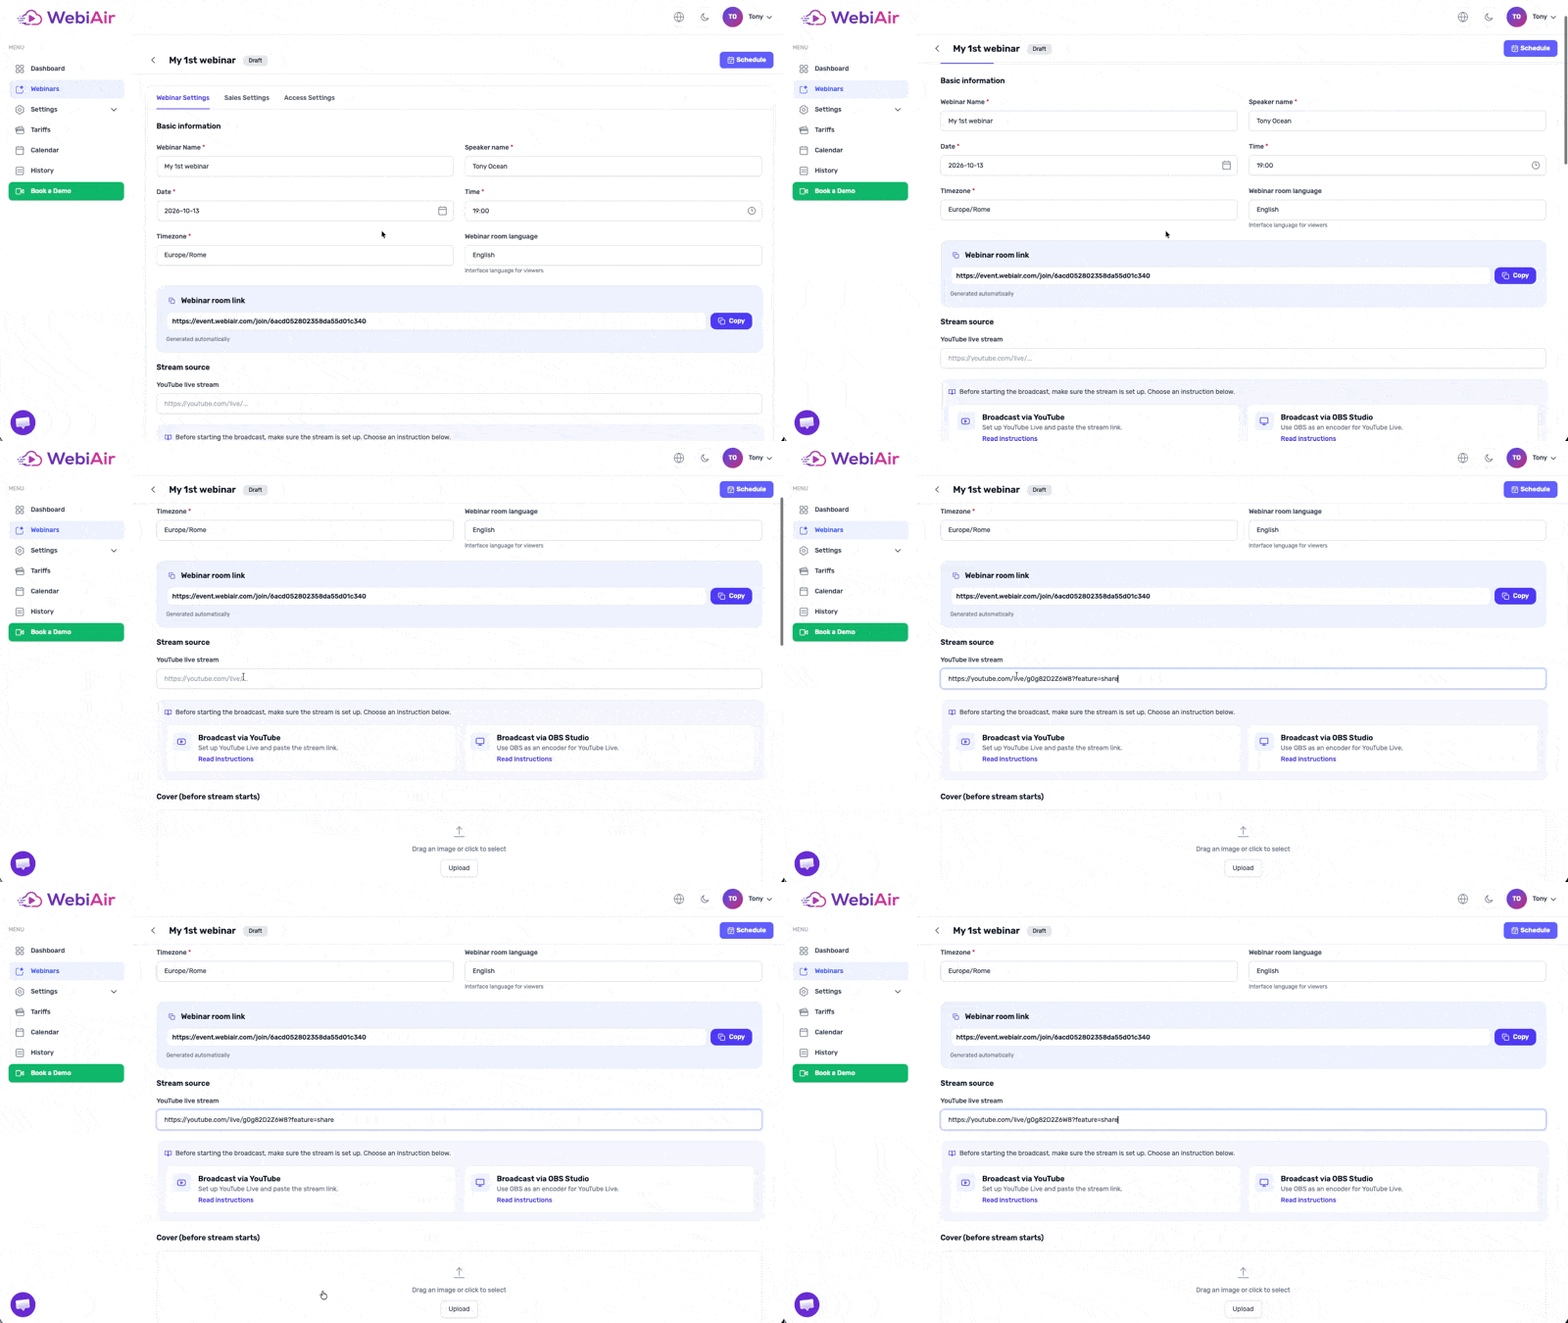
Step 5. Add Your Webinar Cover Image
Optionally, you can upload a cover image for your webinar, which viewers will see before the live stream begins.
The recommended image dimensions are 1920 × 1080 px.
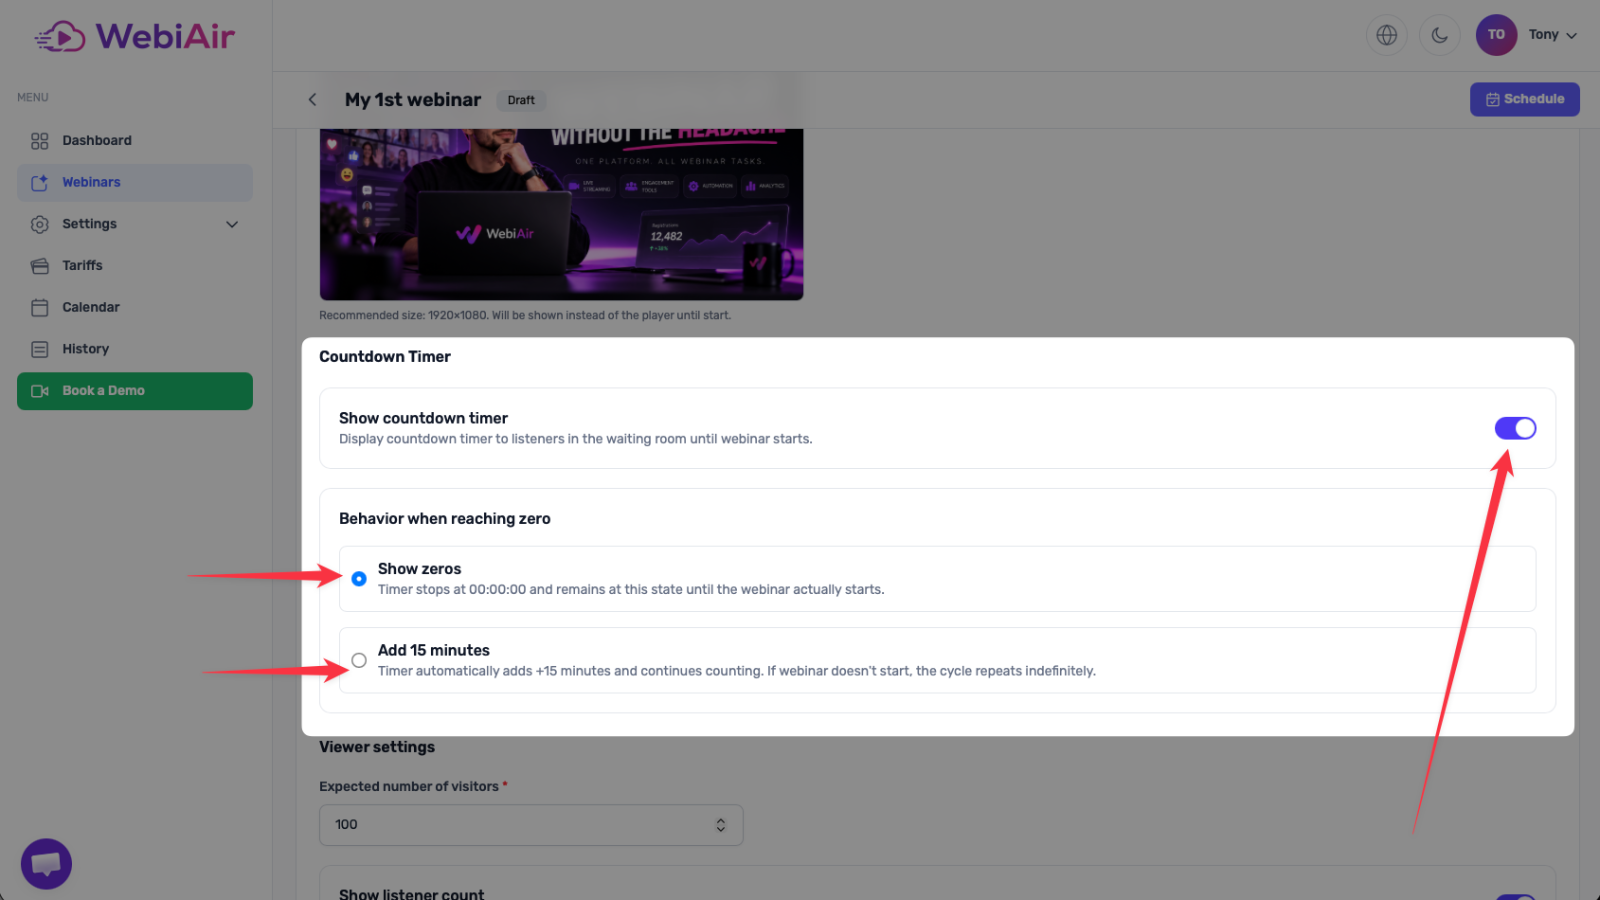
Step 6. Countdown Timer
The countdown timer is displayed in the webinar room before the webinar begins.
You can choose to hide the timer or configure what happens when the scheduled webinar start time is reached:
Keep the timer at 00:00:00 until you manually start the webinar.
Automatically add 15 minutes to the countdown until you click the “Start” button to launch your webinar.
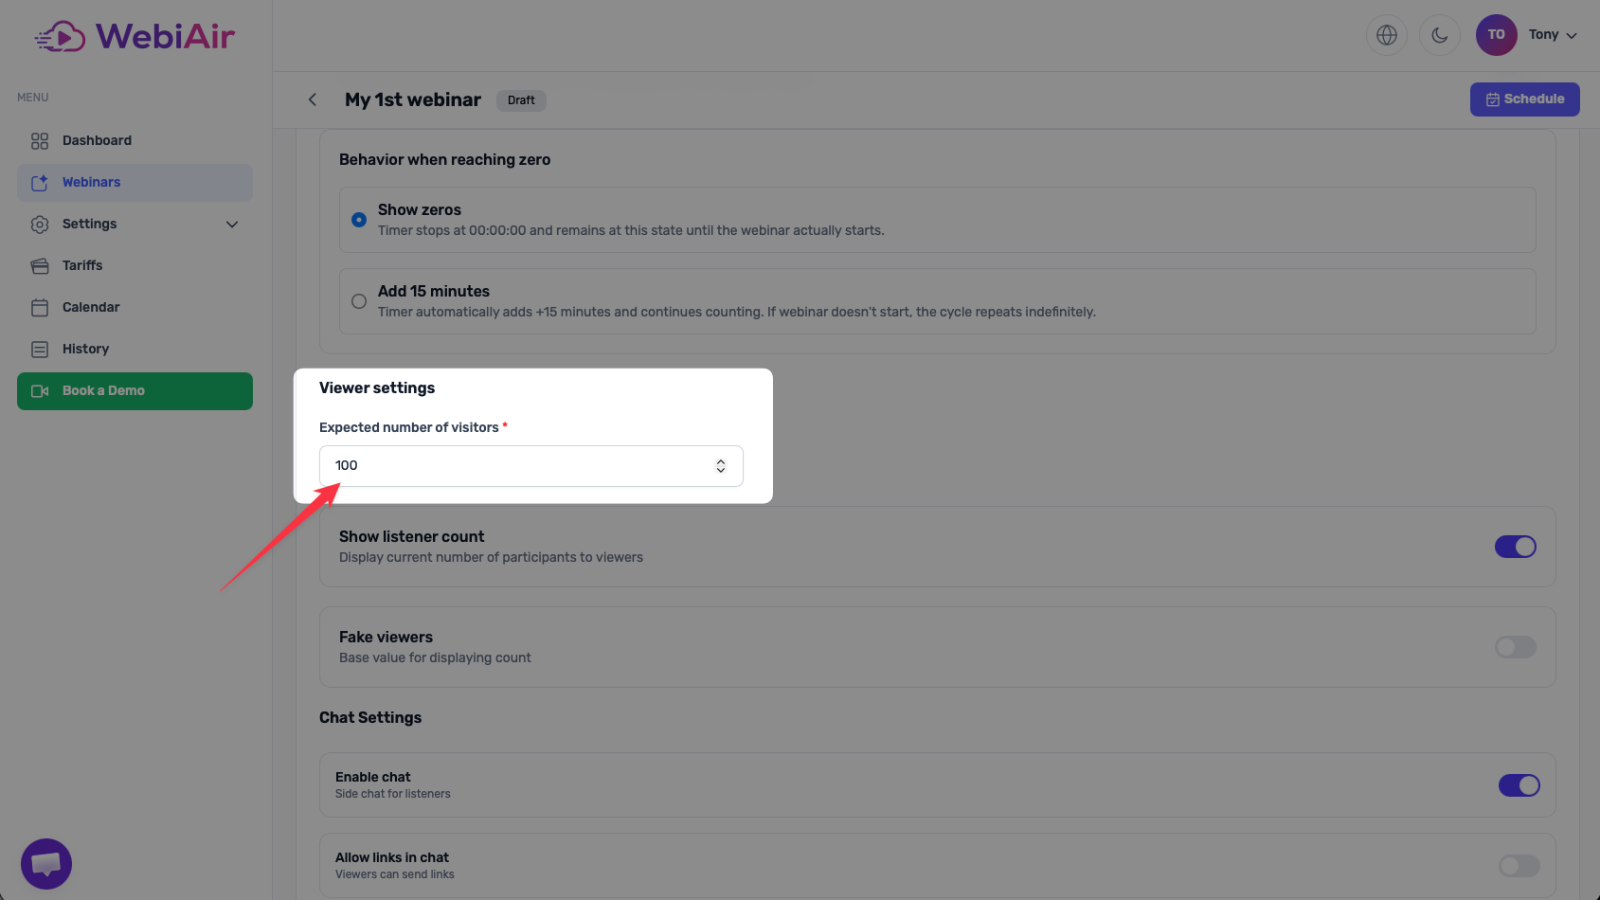
Step 7. Configure the Expected Number of Viewers
Enter the approximate number of viewers you expect to attend your webinar. This allows the platform to automatically allocate the necessary resources to ensure a smooth broadcast.
Based on typical attendance rates:
Free webinars: Approximately 20–35% of registered participants are expected to attend.
Paid webinars: Attendance rates typically start at 35% and can be higher.
Step 8. Viewer Count Display and Boosting
You can control whether the number of viewers attending your webinar is displayed.
Show listener count: Turn the toggle on to display the current viewer count in the webinar room.
Disabled: Turn the toggle off if you prefer to hide this information from your viewers.
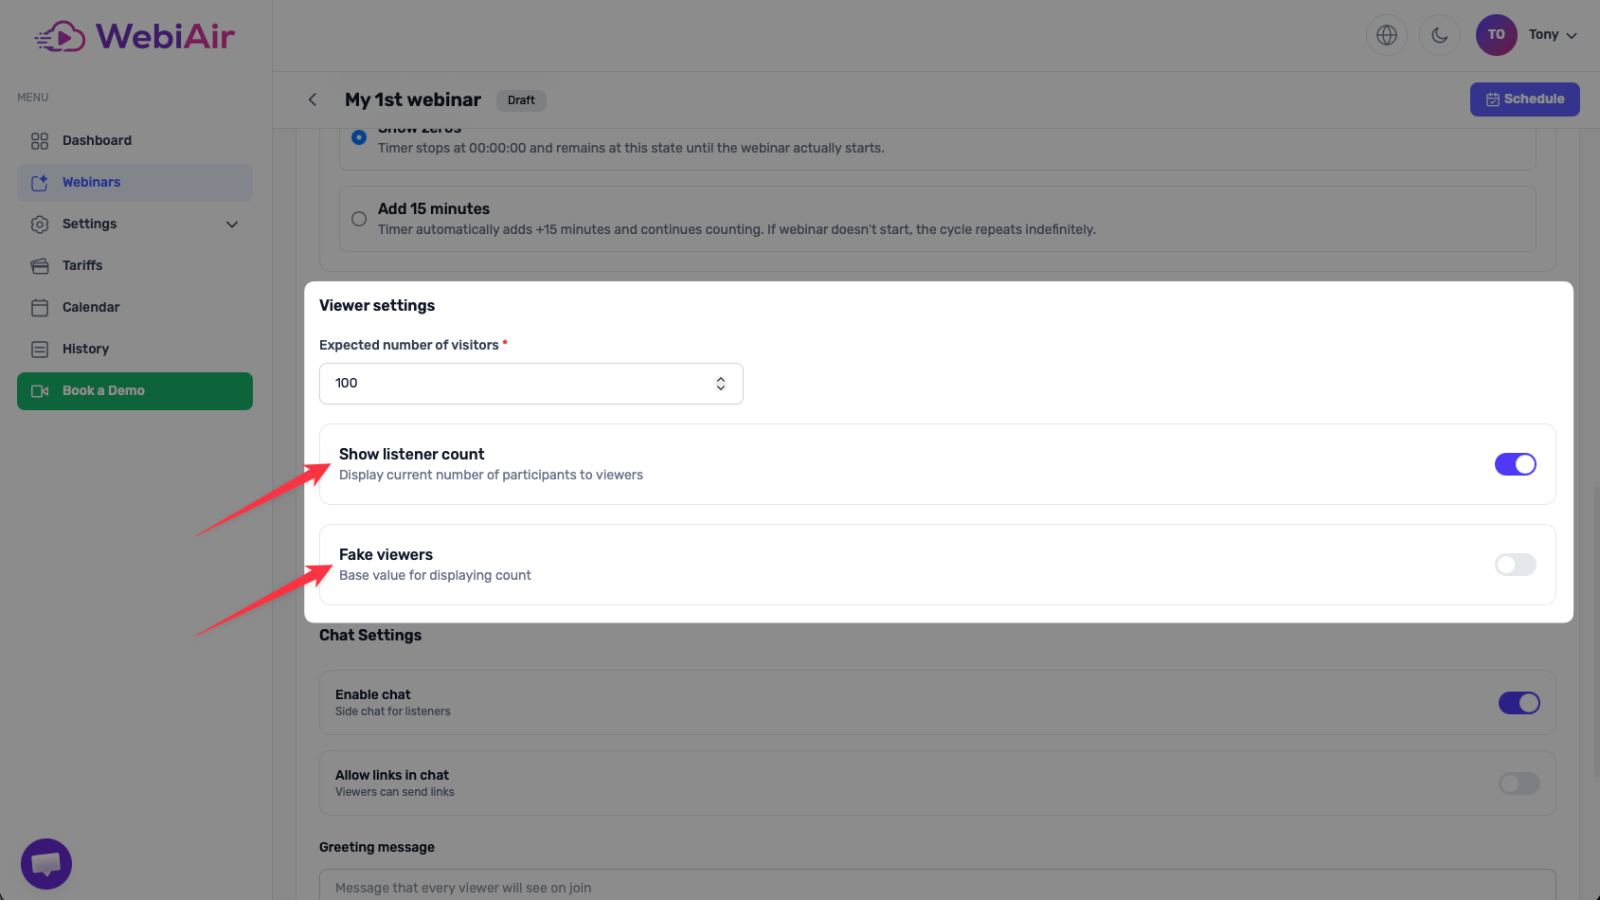
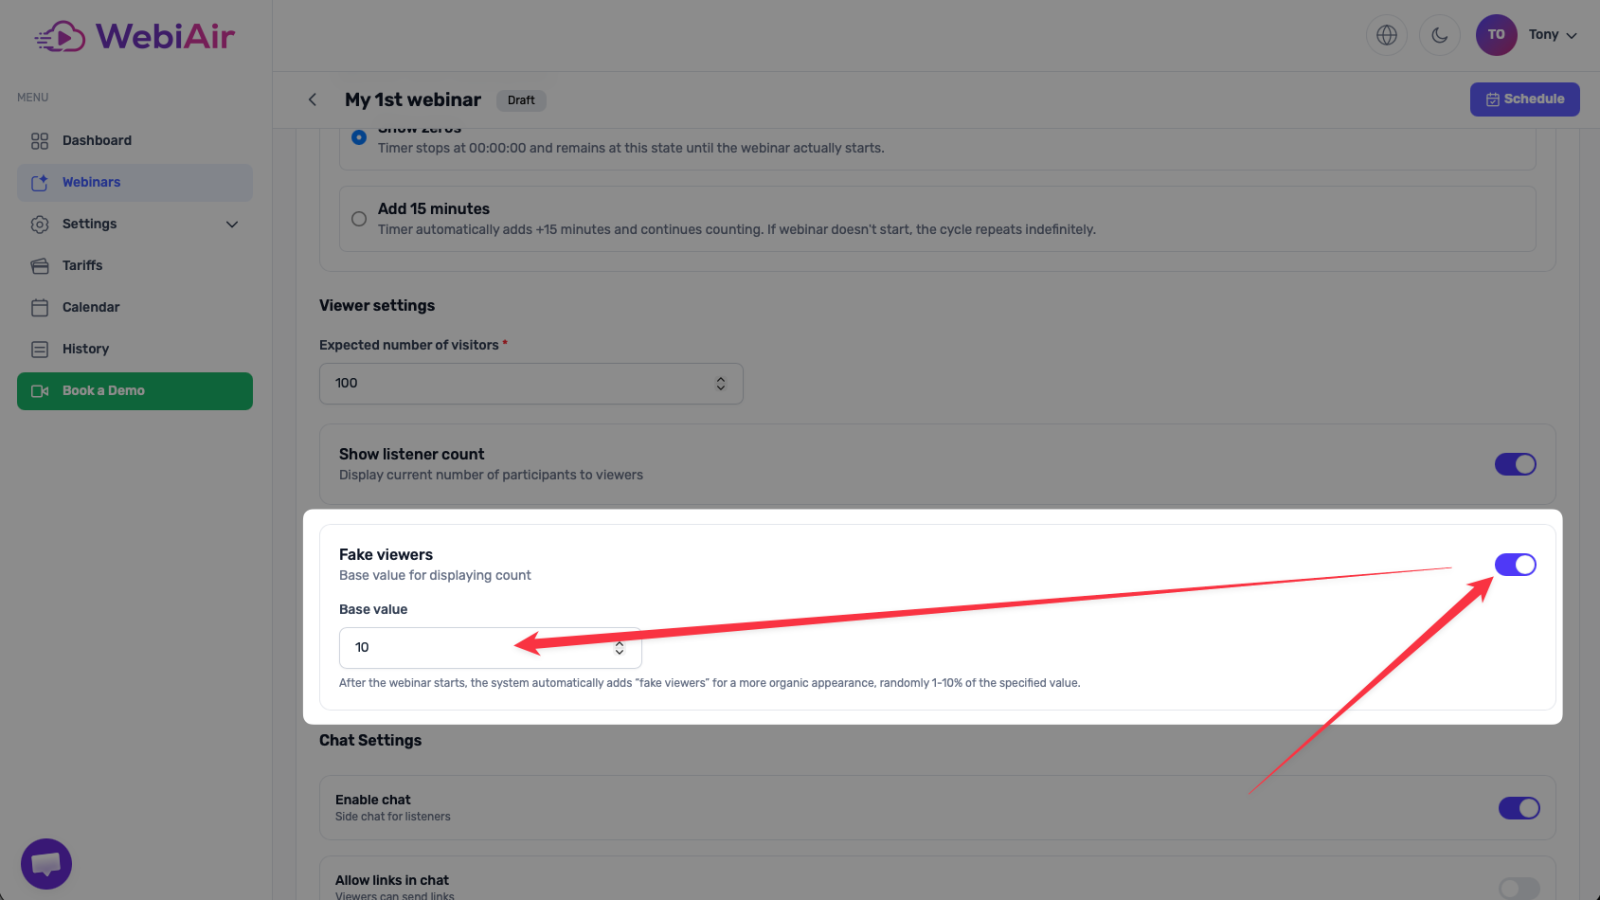
Enable the “Fake Viewers” feature and set the number of viewers you want to artificially add to the viewer count displayed in the webinar room.
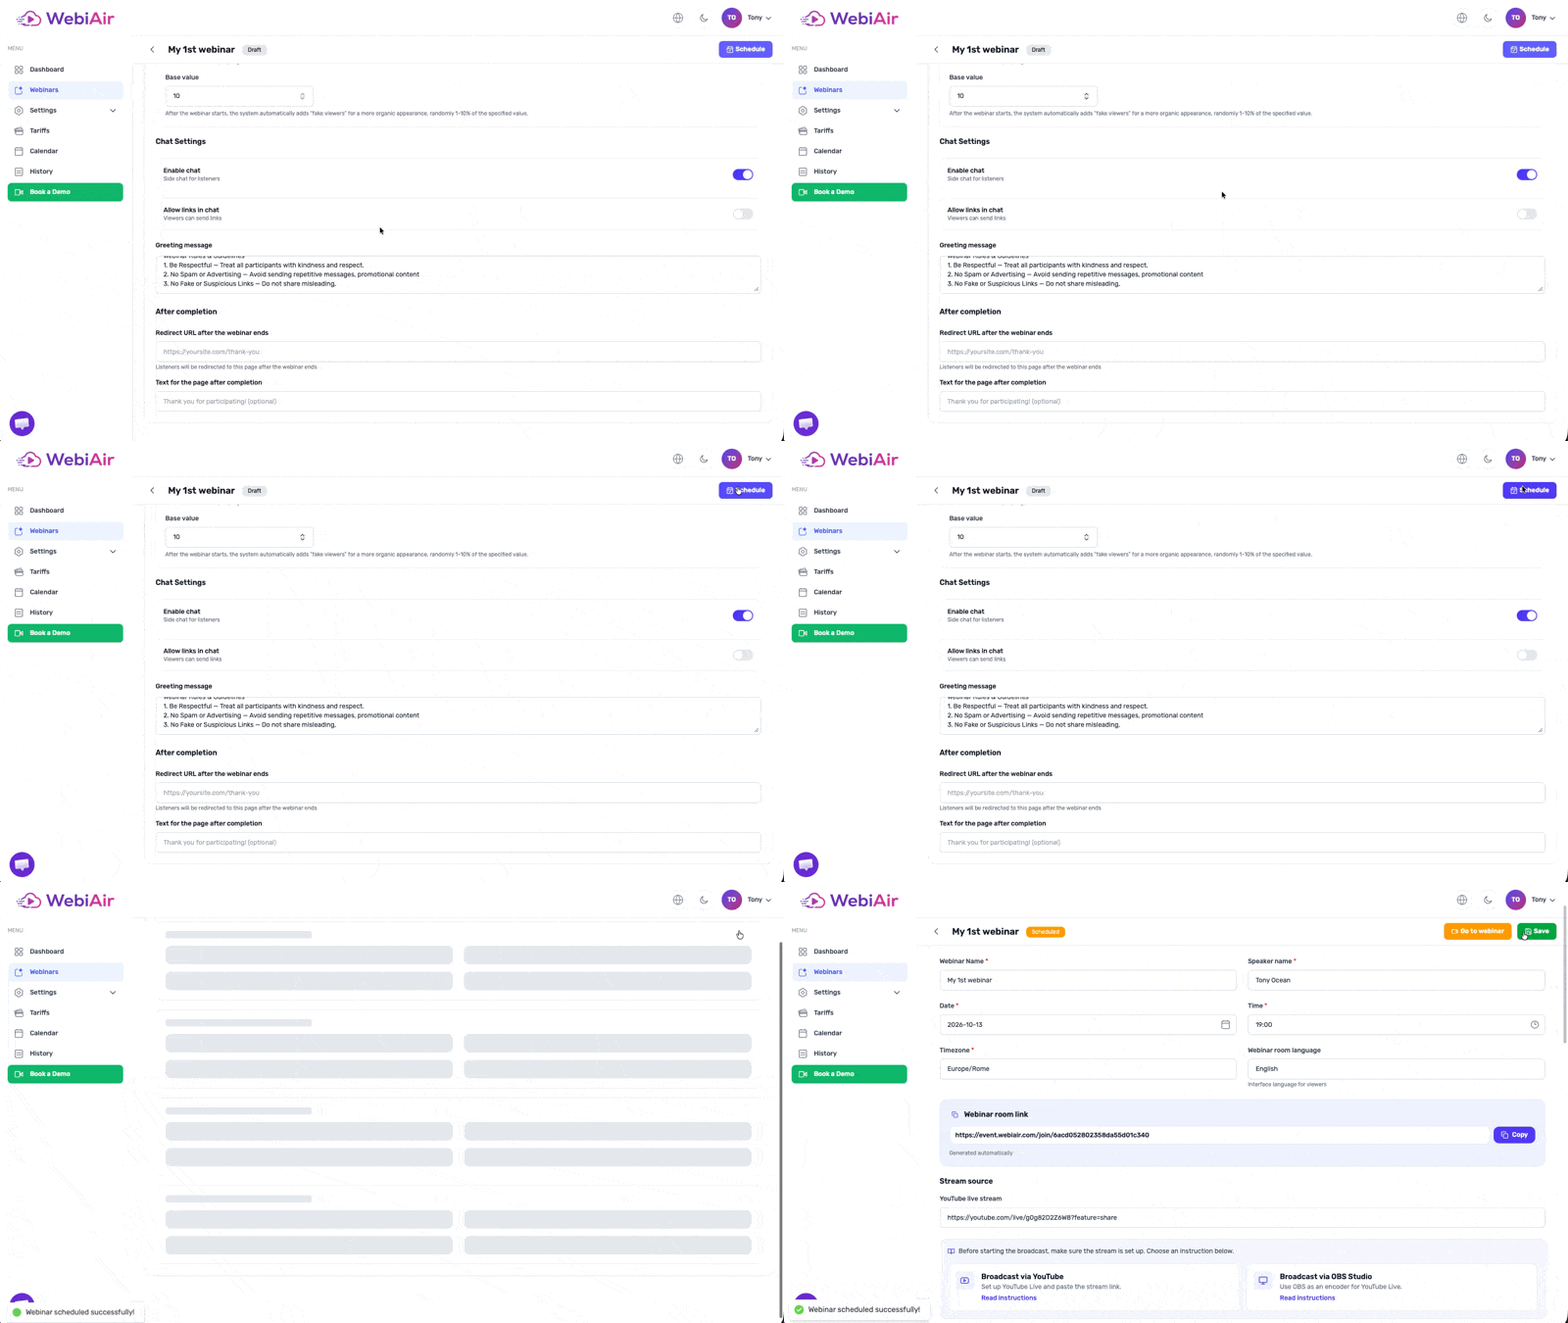
Step 9. Chat Settings
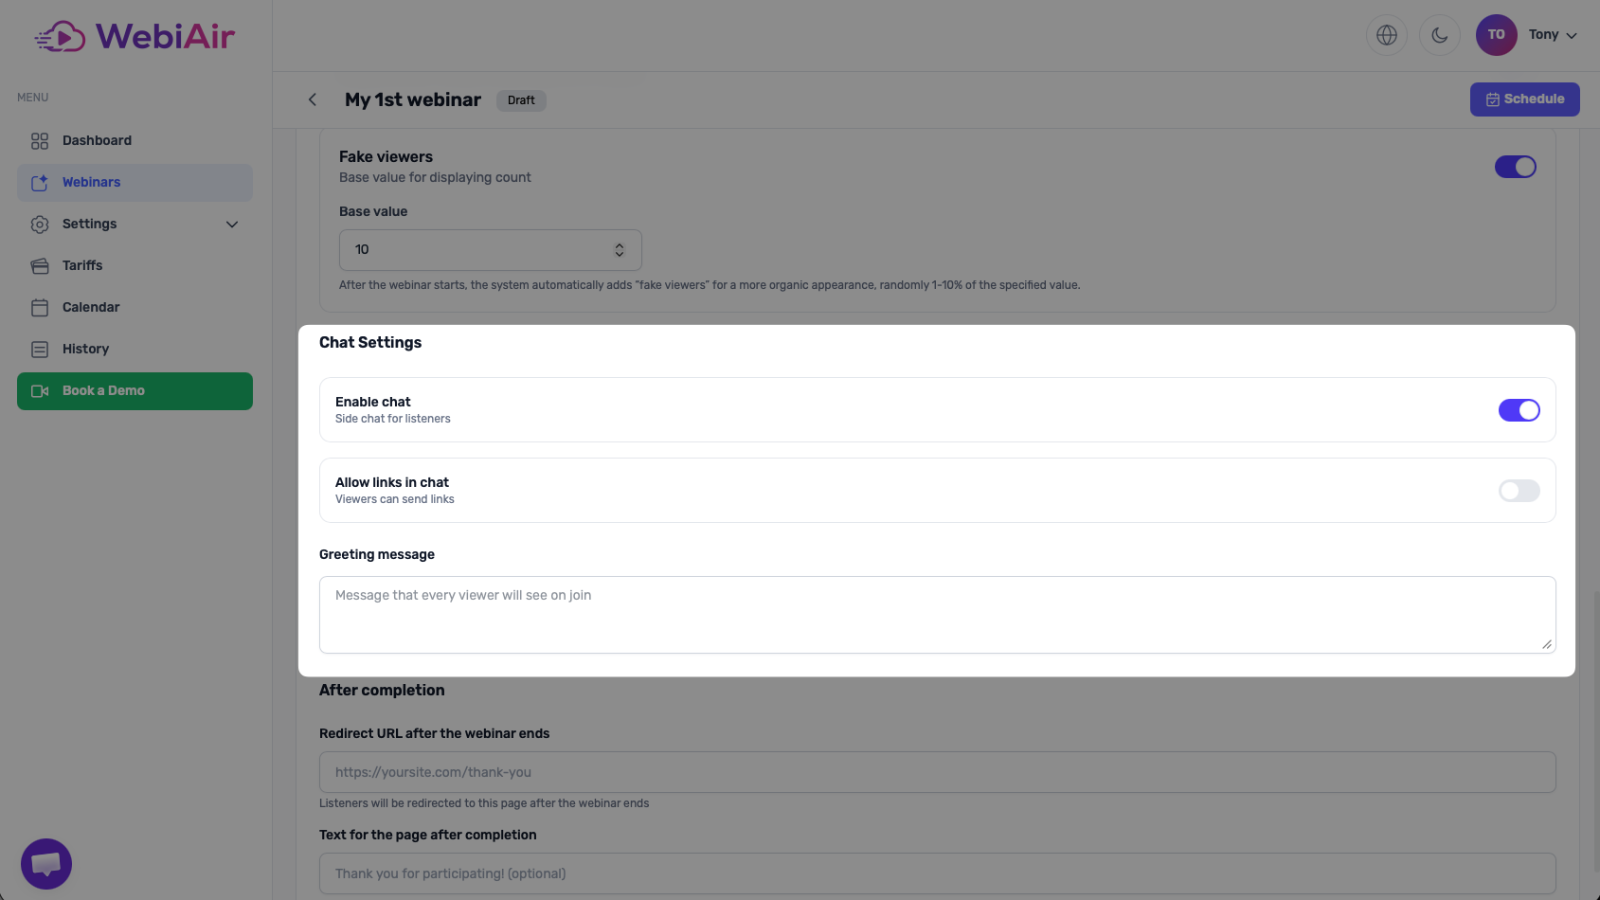
In this section, you can enable or disable the ability for viewers to send messages in the chat.
You can also separately allow or restrict viewers from sharing links in the chat.
Both settings can be changed at any time during your webinar. You can enable or disable chat messages whenever needed, depending on your webinar scenario.
Alternatively, you can leave the toggle enabled to allow viewers to send messages and comments throughout the entire webinar.
Chat Availability
The chat feature becomes available 30 minutes before the scheduled webinar start time.
Before this time, viewers who enter the webinar room will not be able to send messages or leave comments, even if the “Enable Chat” option is turned on.
Welcome Message
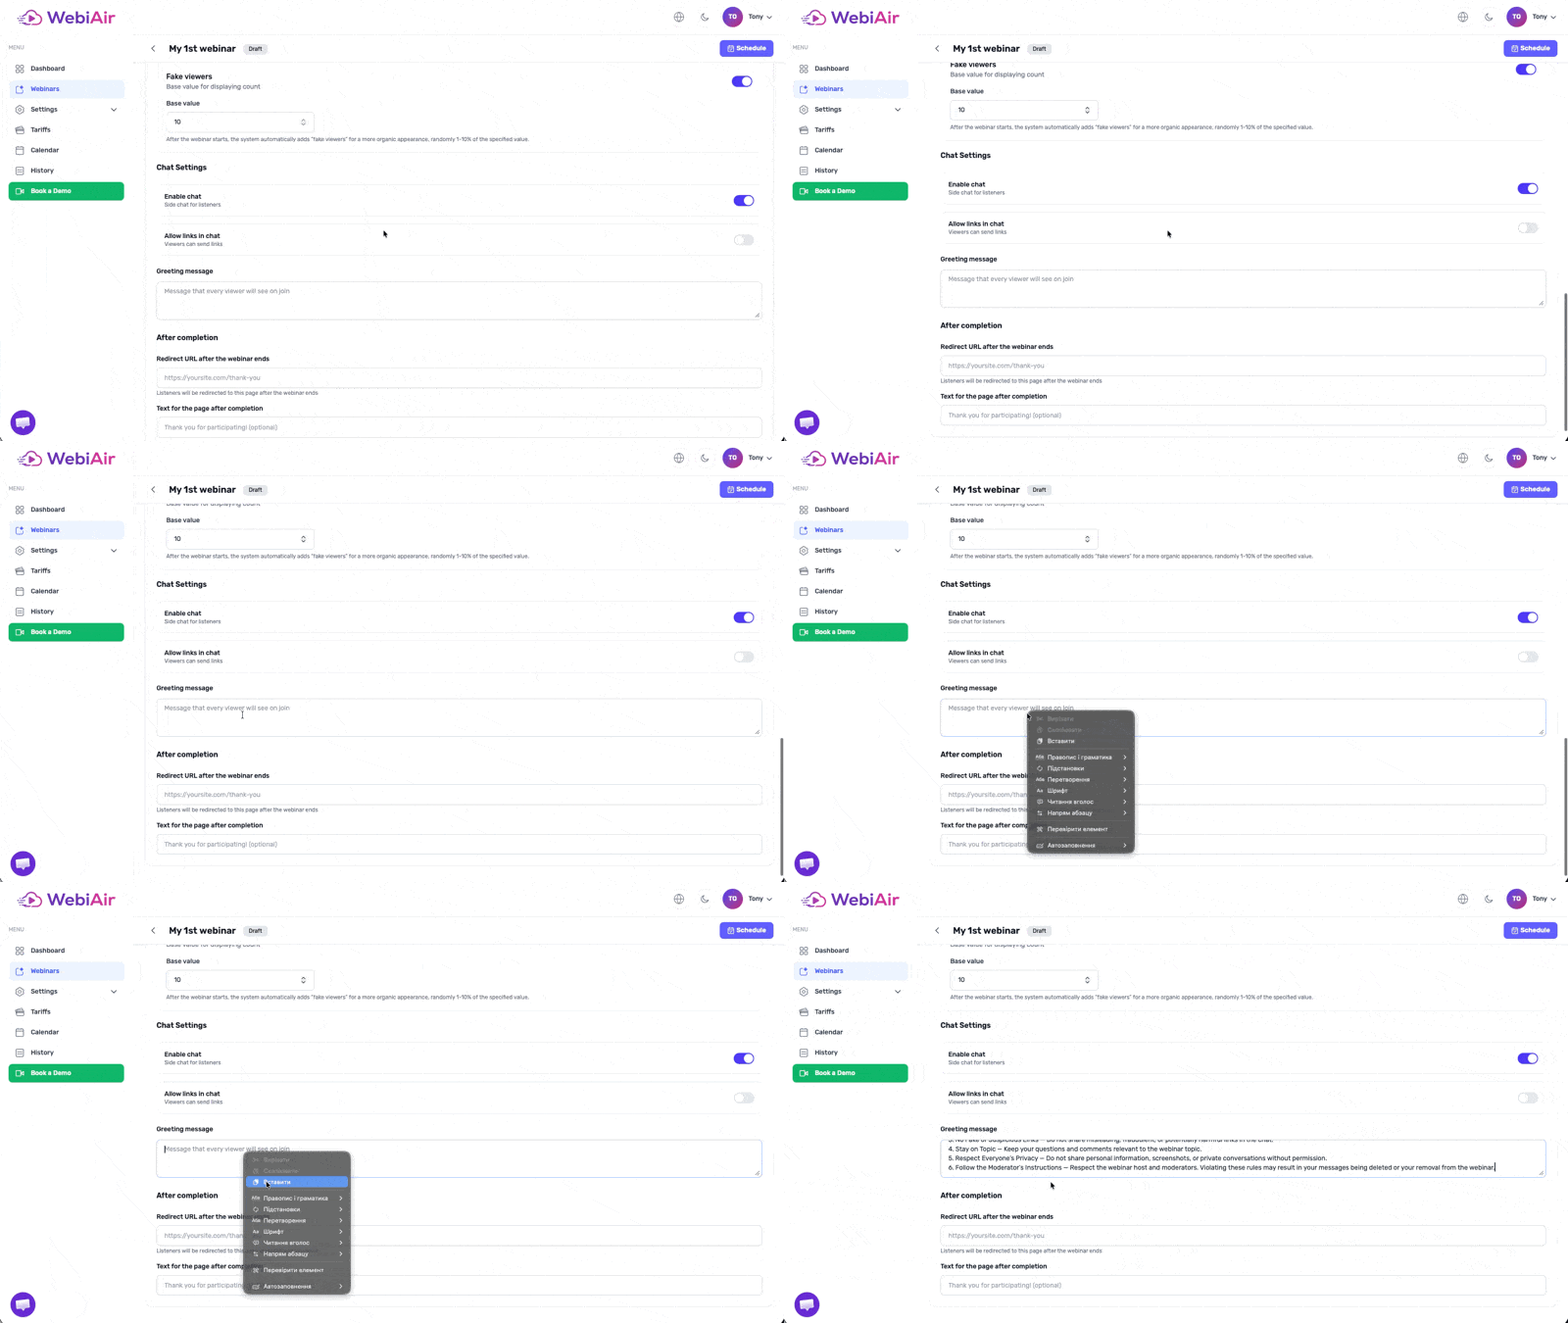
You can create a custom welcome message that will be displayed individually to each new viewer when they enter the webinar room.
This message is shown only to the viewer who joins and will not be duplicated or displayed to other webinar participants.
Step 10. Add a Link or Message After the Webinar
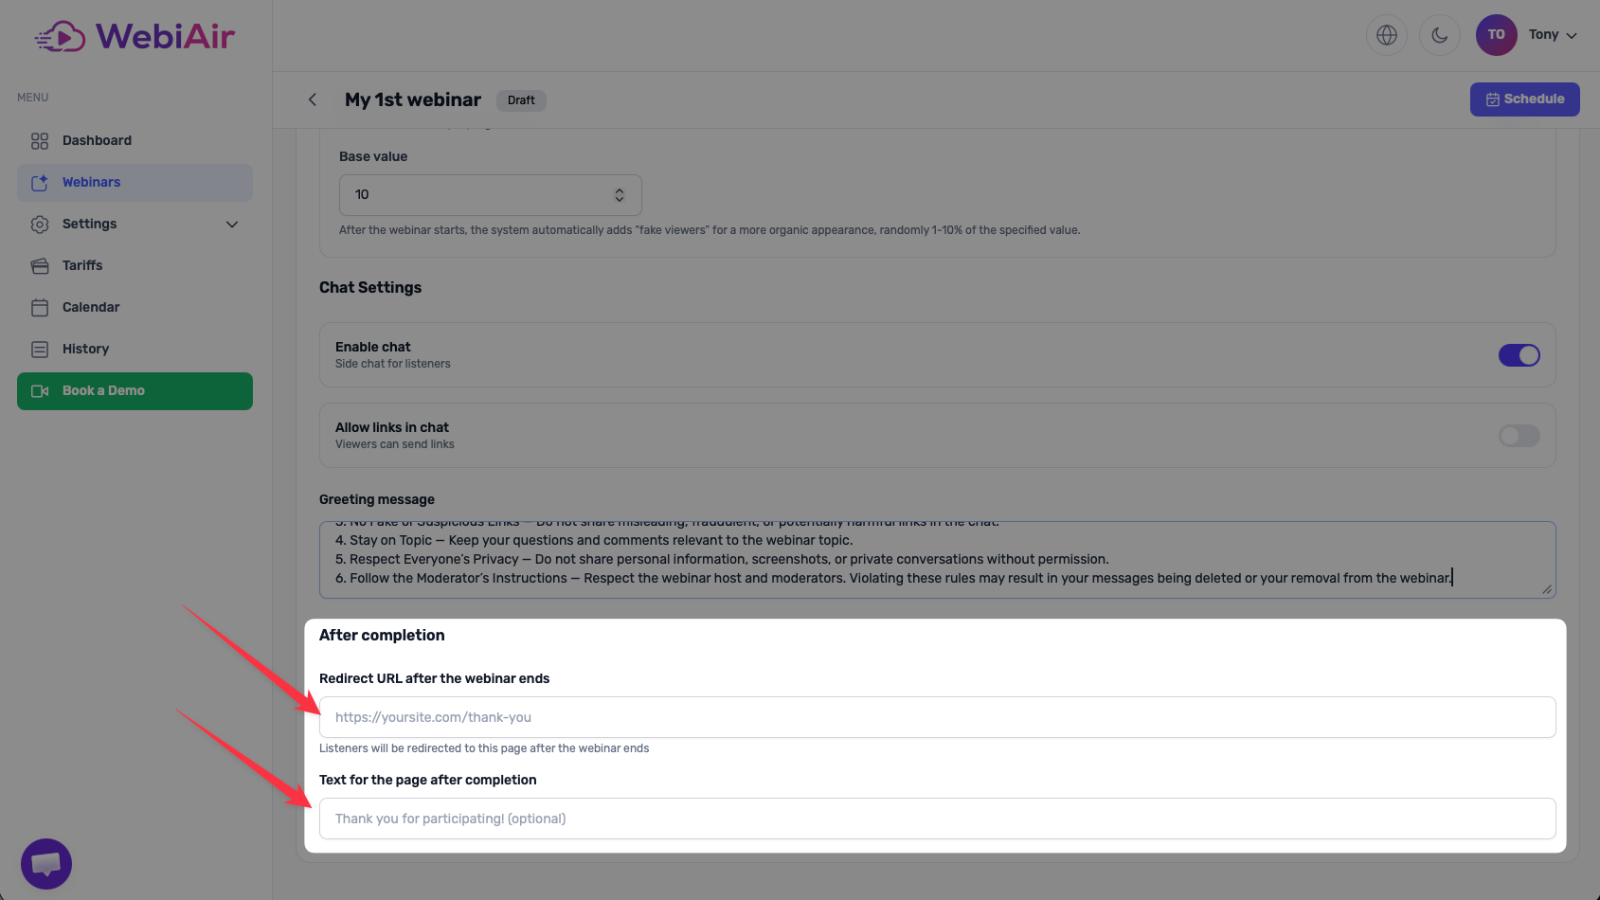
Marketing Block — Add a link to your website or any other page where viewers will be automatically redirected after the webinar ends.
Alternatively, you can enter a custom message that will be displayed to viewers once the webinar is over.
Step 11. Save All Settings
Once you’ve configured all the necessary settings, click the “Schedule” button in the top-right corner to save your changes.
¿Te resultó útil este artículo?