
Banner Settings
In this article, you’ll learn how to configure banners for your webinar room.
What You’ll Need Before Getting Started:
A created webinar (click here to view the instructions)
An active paid subscription plan (click here to choose a plan)
Step 1. Click the “Add Banner” Button
Scroll down the page slightly if you’ve already created buttons.
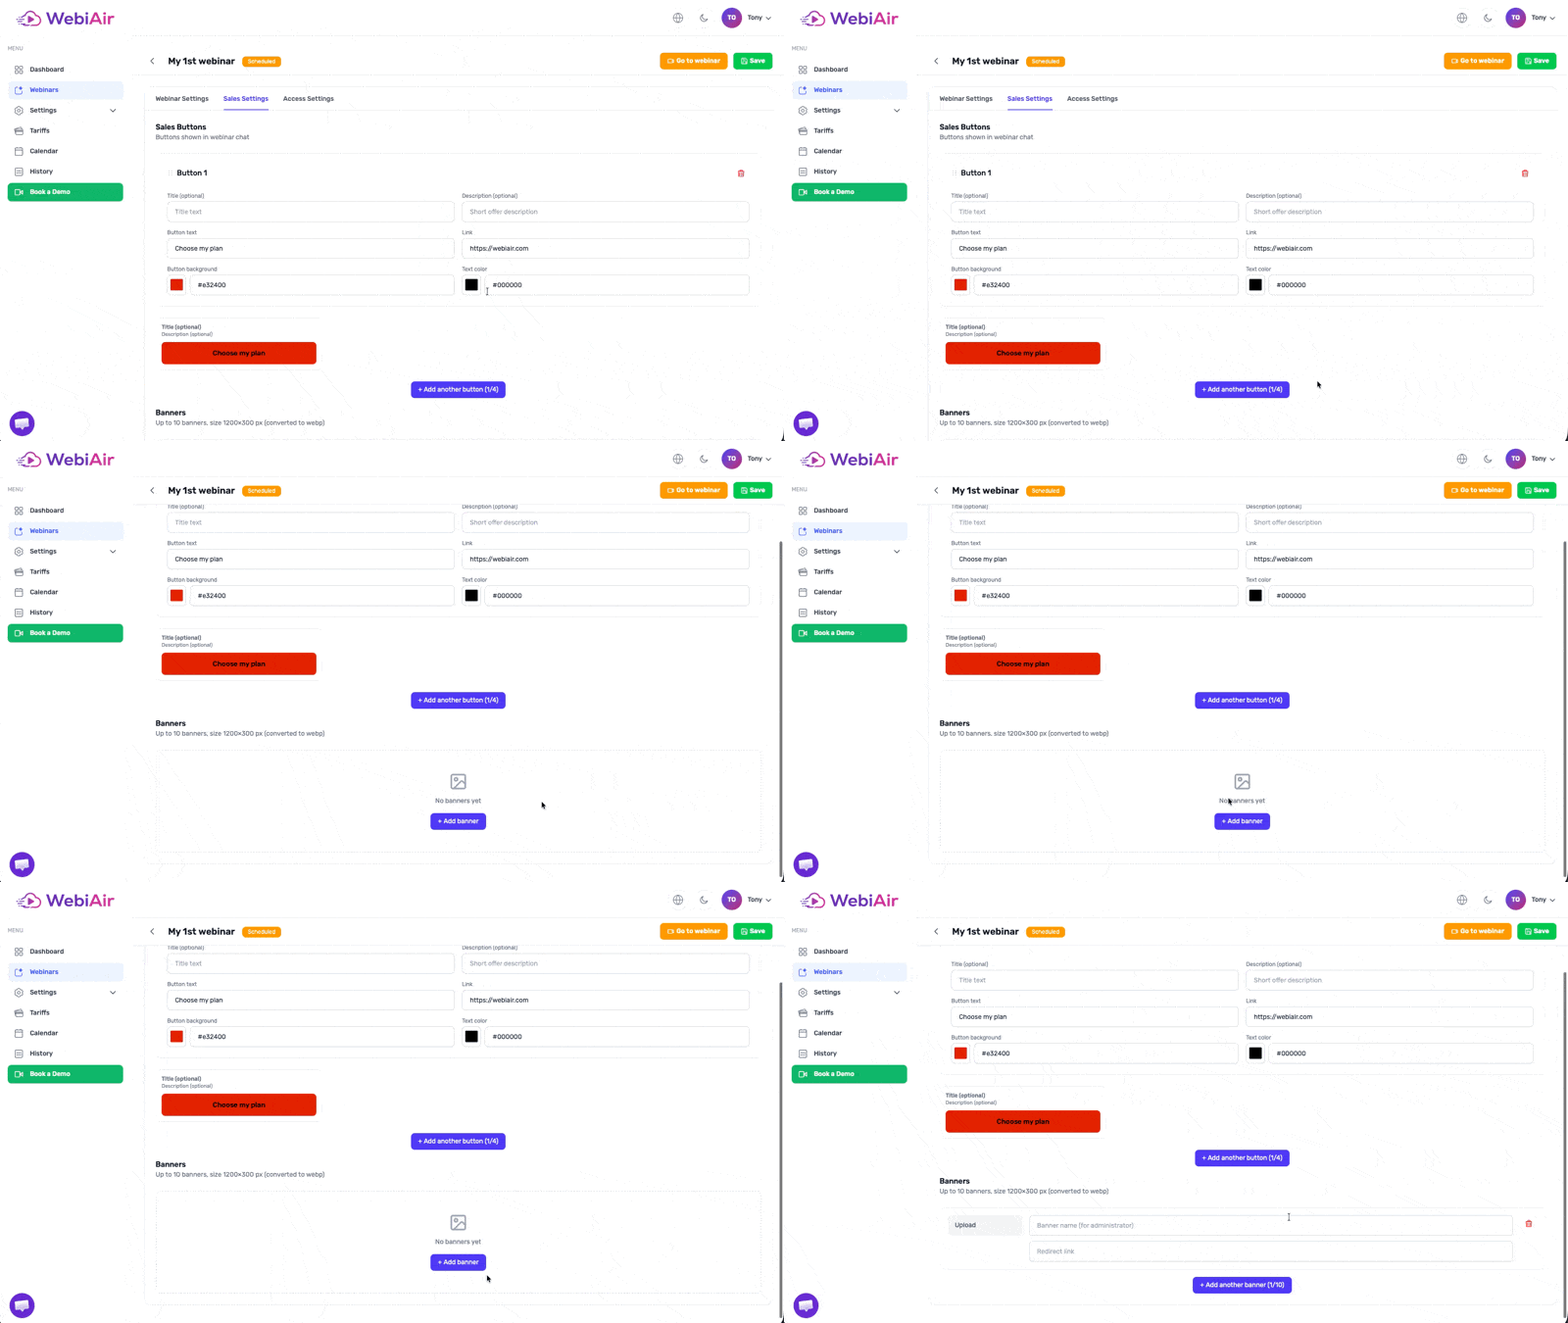
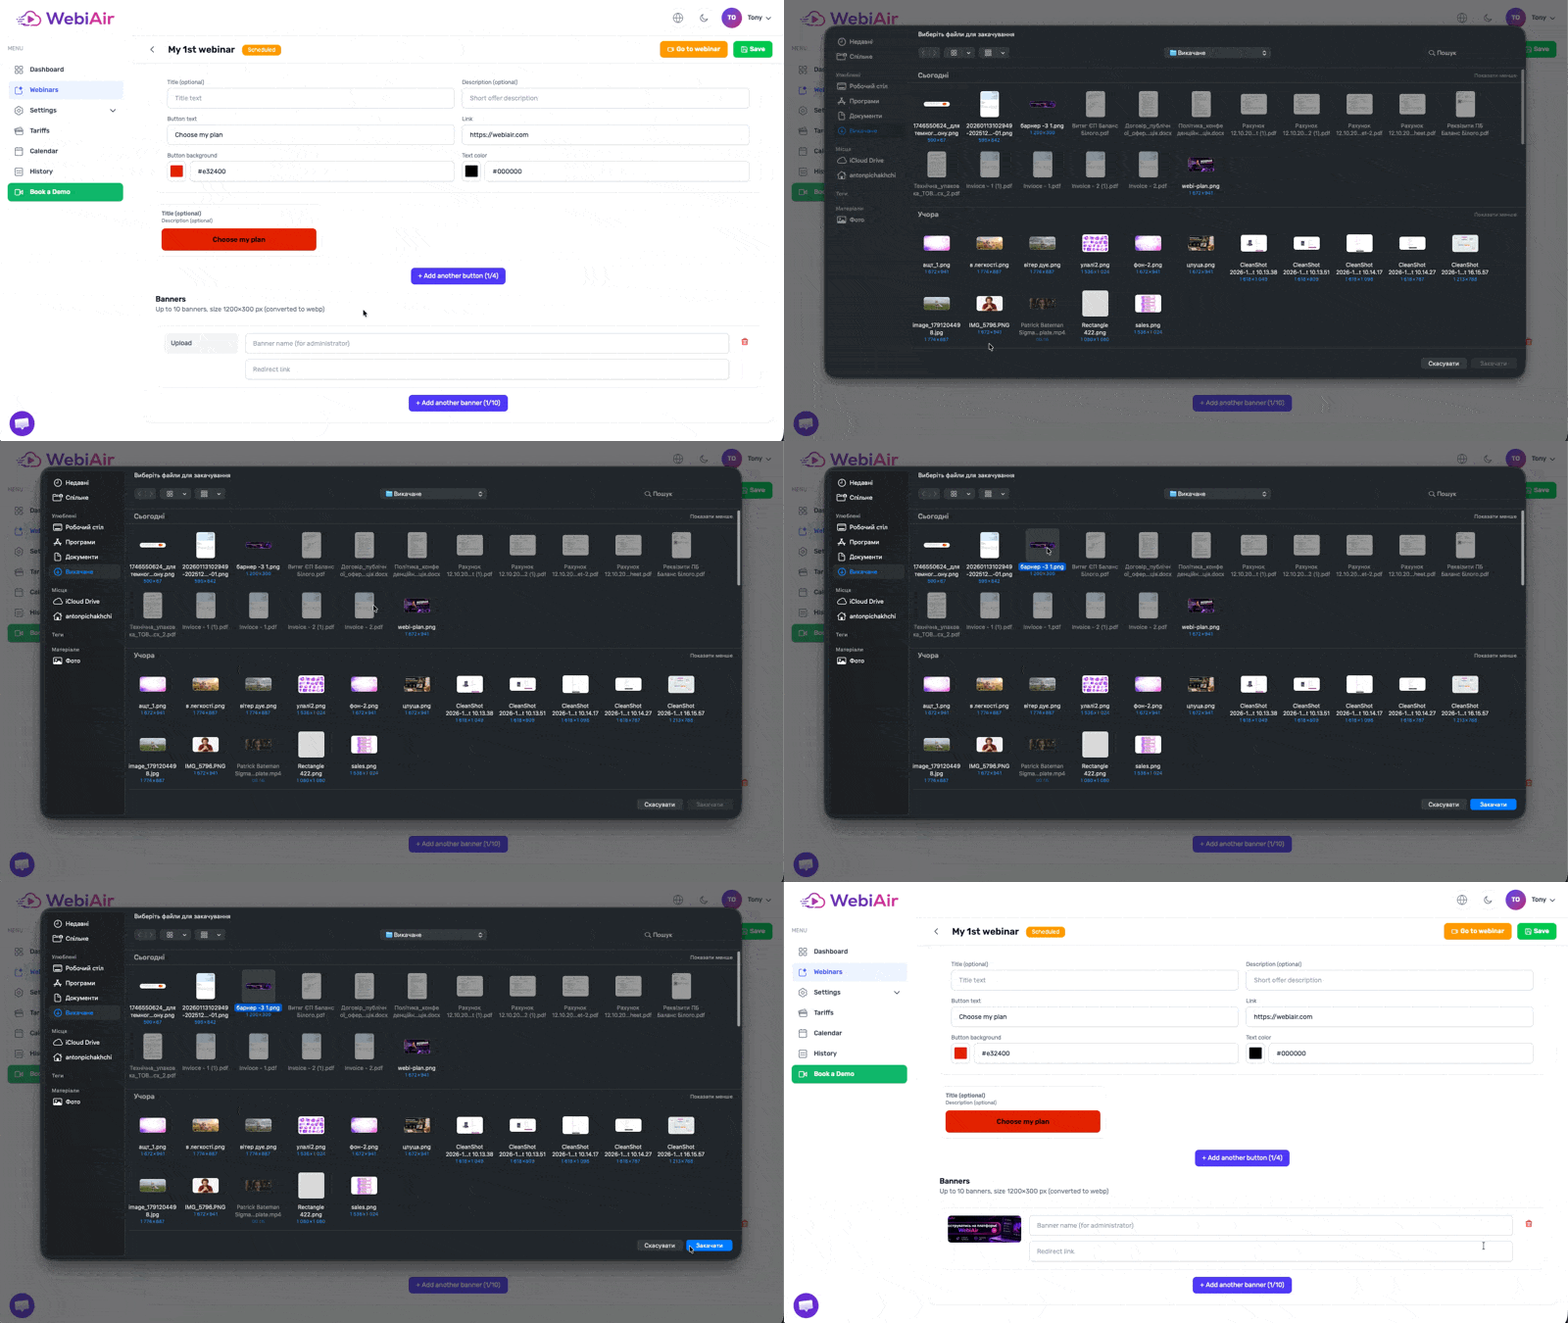
In the banner settings that appear, upload your banner image. Click the “Upload” button and select an image from your files.
IMPORTANT! The recommended banner dimensions are 1300 × 300 pixels.
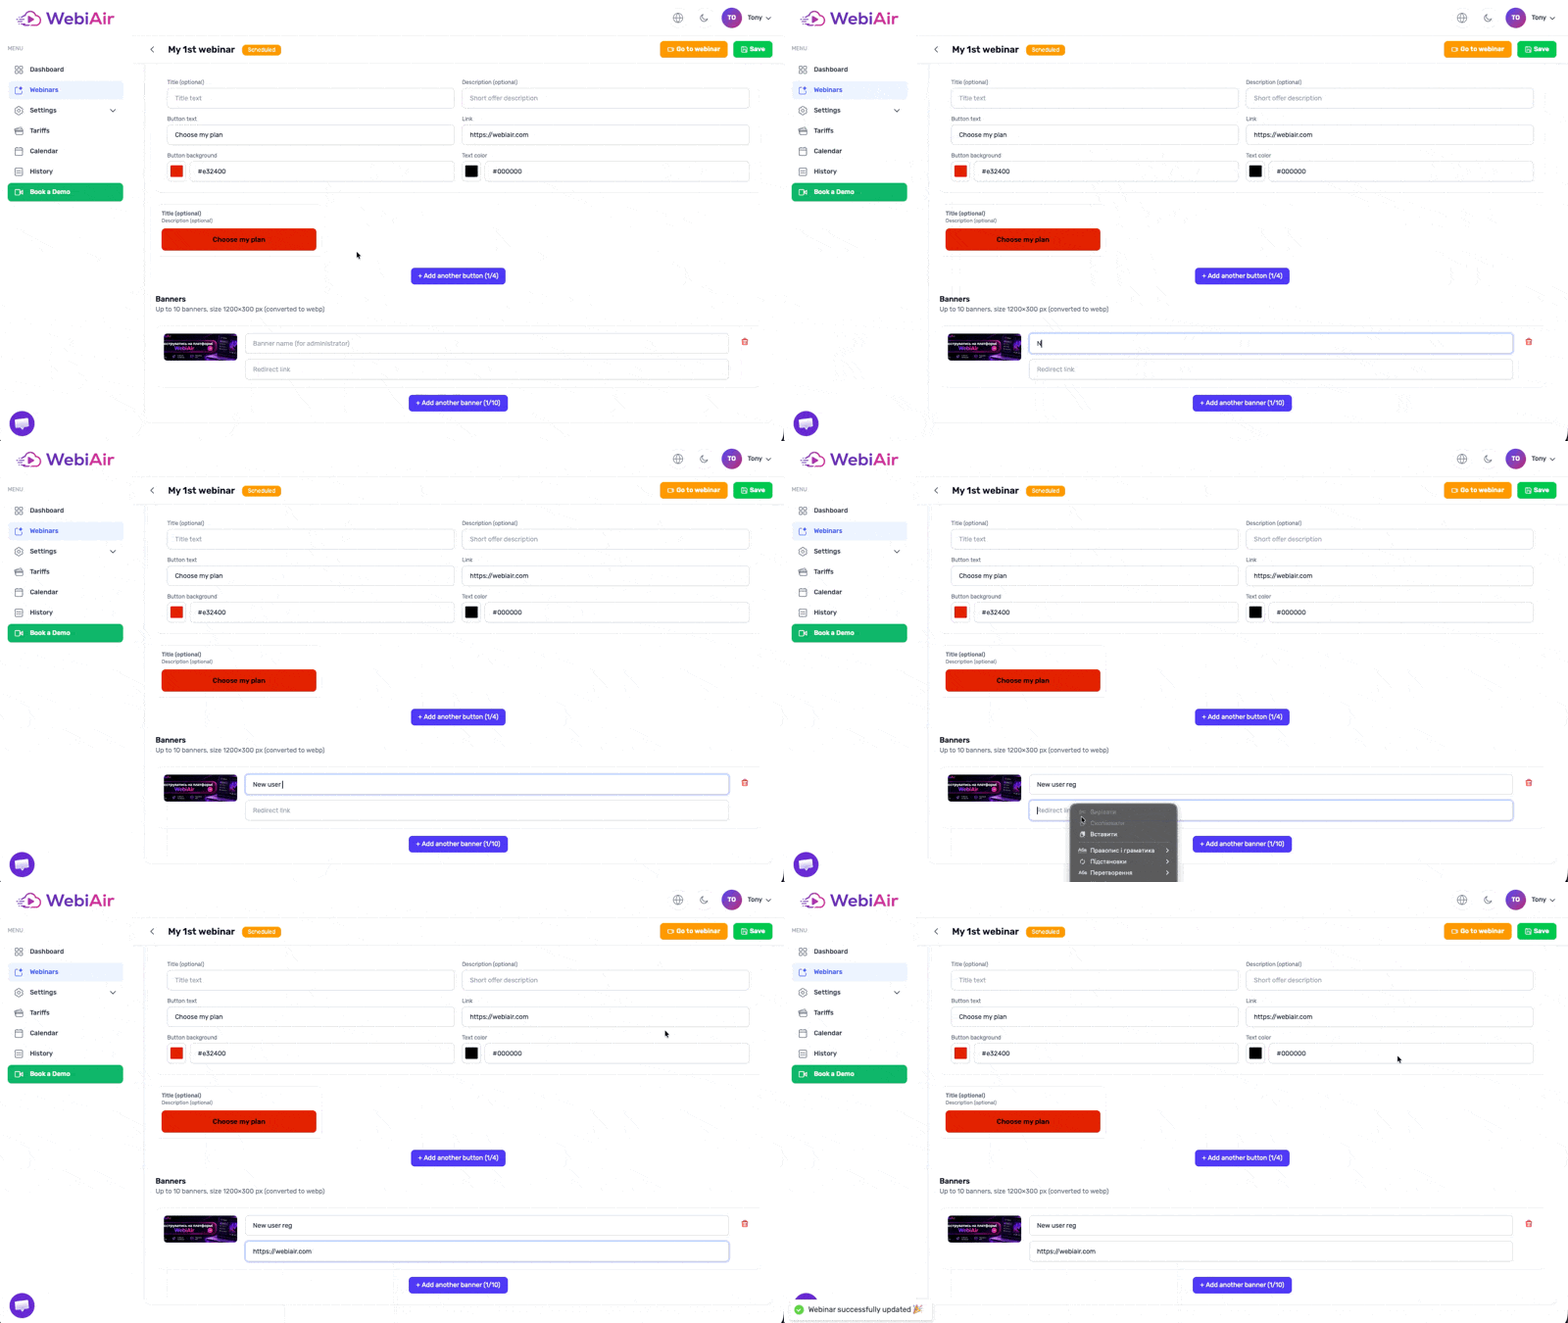
Enter a banner name for the administrator so you can easily identify which banner is associated with each button during the live webinar.
Also, add the destination URL where viewers should be redirected when they click on the banner.
Once you’ve entered all the required information, click the “Save” button in the bottom-right corner.
Was this article helpful?